Thursday, June 28, 2012

Colorado Springs Fire

These were the scenes in my town yesterday evening.  We have over 30,000 people who have been evacuated and many homes were lost.  Personally, I know 4 families who live in the heart of this mess, 3 of whom still don't know the fate of their homes.  Landmarks have been lost, homes have burned to the ground.  The uncharacteristically  high temperatures and extreme dry conditions have only worsened the situation.  


After 3 1/2 days of the wildfire burning forest but not structures, a 65 mph wind gust pushed the fire up and over Queen's Canyon and a rapidly moving wall of fire came racing down the hill above this large subdivision.  Many of the residents in the area had been evacuated since Saturday, but those living in the area shown immediately above went from pre-evacuation status to mandatory evacuation Tuesday late afternoon and had very little time to get in and get their things.  As of now, there are no reported lives lost which is, in and of itself, a miracle.  Homes can be replaced, people cannot, so while we rejoice in that, we hurt for those who will have to start all over. 


My home is on the "right" side of the interstate.  We are safe and not too worried about the fire coming this way.  Regardless of this, I have friends who are displaced and uncertain as to the fate of their homes.  Our city has been deeply hurt by this horrible wildfire.  I hope you can understand that the posting of my pretty little pictures of my tschotskies seems trivial in comparison, so I will forgo that for a bit.  Please pray for the people of Colorado Springs and the surrounding areas and, of course, for our brave firefighters who are enduring almost unbearable heat and fatigue to try and keep this monster at bay.  I will post again when it seems more appropriate.

Until next time,


Pin It!

Thursday, June 21, 2012

No Dear, the Irony is NOT Lost on Me...


 So Peeps,

Tell me...you can be honest.  Have you ever bought a little something, say, a cute stool, and it was old and chippy, and dirty and good bones but kinda distressed.  And then, you spend say a couple of hours over a couple of days a couple of times "refreshing" the piece, only to realize you now had a little something, say, a cute stool, that was old and chippy, and dirty and good bones but kinda distressed?  Only somehow your new and improved version was still better because it was clean and cuter on some level?

Not that that scenario has EVER happened to me...


I was just wondering about you guys...


And apparently, I couldn't stop taking pictures.


Now that she's been redone, I may have to find a place for her in my home...


But, since space is at a premium...


there's a good chance you will see her...


in an Etsy shop near you.  Specifically, Elegant Farmhouse.


Very soon...


In all of her chippy and distressed glory.  Annie Sloan Chalk Paint and clear and dark waxes rock!


 I'm glad you all "get me".  Mr. FL and I did have a nice laugh over this one though.  I missed taking "before" pictures, but trust me, it was worth the do-over.  Really.


Until next time,


Linking up with:
Feathered Nest Friday
Home Sweet Home
Vintage Inspiration Friday
Shabbilicious Friday

Pin It!

Tuesday, June 12, 2012

The beauty is in the details...

A tall plaster of paris pillar I fauxed many years ago

When I first started reading blogs, the thing I remember being most taken with was the photography (yes, I know, I'm a look-at-the-pretty-pictures kinda girl).  Specifically, I was most enchanted at the way some people were able to zero in on little snippets of an object and make the most  dreamy and wonderful photos.  Those photos made me look for and better appreciate the beautiful details of even ordinary objects...the way the sunlight streams through a window through a lace curtain, the crackle of an old painted finish, the tattered velvet of an old millinery flower, and even the sharp contrast of an old bowl filled with fruit.  While there were MANY talented women out there who inspired me, Heather Bullard, Suzanne Duda, Heather Kowalski, and Tiffany Kirchner-Dixon were the first that I remember just being in awe of; their attention to details in their art and their photography on their blogs made me drool, then and now.  Of course, I've grown the circle now to include so many talented bloggers and shopowners that I couldn't possibly name all of those sources of endless inspiration, but I do appreciate you all for showing me the beauty in the details and for helping me to stretch to find it and photograph it in my own surroundings.


For White Wednesday, I thought I'd share a few details of the many shades of white and gray and textures around my home.  I wish I could say that these little bits of minutia were some of my best photography, but sadly, the muse must have been on vacation today.  Oh well, some days are like that. 

Ironstone butter pats

Frame I made over with Annie Sloan's Chalk Paint

Corner of a frame-love the metal wreath!

Antique hankies

Sweet millinery horseshoe for luck-probably from a wedding long ago


Detail of an ironstone mug

Beautiful pouch from Rhonda at A Little Bit French


Old French letters and various ephemera that inspires me


One of my favorite old gesso mirrors

Little faux enamel tags I made this spring

The tote I won from Tracey at French Larkspur ages ago...LOVE!

Antique hand towels
My favorite little statue
I hope you will join me at Faded Charm for a little more inspiration with all of the wonderful whites of White Wednesday.  Look for the beauty in the little details in your life...you'll be glad you did!

Until next time,
Also sharing at:
Share the Love Wednesday
Vintage Inspiration Friday

Pin It!

Sunday, June 3, 2012

A Sunny Sunday and Time to Get Back to Work


Hello all and happy Sunny Sunday!  We had the most glorious warm June day today.  The kind of day that made you want to go walk barefoot through the garden sipping an iced tea or something like that.  But did I get to do that?  Not really...I have desperately needed to get back to my poor neglected little Etsy shop, Elegant Farmhouse and do some restocking.  I also had a shift at the hospital today (24/7, 365, you know how that goes), giving me limited time to do ANYTHING.  So, instead of whiling away the hours conferring with the flowers (any Wizard of Oz fans out there to get my humor???), I stayed indoors and got some much overdue shop keeping done.  I hope you'll forgive me the shameless self-promotion, but I do have some dandy offerings and they make a pretty picture as well.  That and I don't have much of anything else to blog about.  INSERT SHEEPISH GRIN HERE... Hey, I'm nothing if not honest...

The beautiful clock face above is a recent find.  It is Seth Thomas and get a load of the cool shape.  It is paint over zinc.  LOVE it!


The little bobbins you all were so complimentary of a few weeks back finally made their way to the shop as well as the cute cast iron urn.


Any Nebraska fans out there?  I found this awesome silk embroidered pillow a couple of weeks ago.  I just can't resist the old motto pillows and state pillows.  Such care was taken to embroider them.  If only I had some Nebraska connection...


Can't seem to resist picking up old photos.  These aren't in great shape but they'd been awesome incorporated in artwork, don't you think?  I have a couple of sets of them...


I got busy cutting and ironing some more wallpapers yesterday.  It is amazingly time consuming, but I just love playing with the pretty papers, even if it is just so I can sell them.


There are 10 sheets of different wallpapers, one large page from an old French dictionary, a vintage Bingo card, and a little romantic card all tied up with a yard of pink crinkled seam binding.


I also put together some wallpaper scrap packs of smaller pieces of a bunch of my favorite papers and packed them up in these cute little envelopes I made out of antique ledger paper.  OK, yes, I had fun playing so it wasn't all work!


I hope you all had a good weekend and are gearing up for a great week.  I have a boatload more goodies to add to the shop, so I'll get it done little by little. It's summer!  Woo! Hoo!  I don't want to get so busy that I miss it!

Until next time,


Pin It!

Friday, May 25, 2012

Playing with Natural Dyes


I have to admit, I've always been fascinated by the old ways of doing things...spinning, weaving, milk paint, decorating with natural elements, making bread, you get the idea.  I certainly appreciate the fact that I live in the modern world where I can get what I need when I need it with a minimum amount of effort on my part because I'm lazy like that, but I do think it is a shame that our society has lost so much in the way of knowledge of how to do things simply and without a plethora of resources.  We've lost a lot of self-reliance; I venture a guess that most people, finding themselves faced with a major catastrophe, would be hard pressed to feed themselves, much less adorn themselves and make their environment pretty (WHAT?  No Home Goods?  NOOOOOOOO!!!!!).  OK, I suppose in the wake of catastrophe, we might not be worrying about prettying things up, but once the dust settled, you know you'd want to.  Don't misunderstand me, I think about stuff a lot.  THINK.  Usually, that's as far as it goes.  Then, after I think my deep thoughts about sustainability and self-reliance, I hop on the internet, place my order with Dominoes, pour a glass of wine, and wait for someone to bring me food.  The closest I've gotten to growing my own food was to ask my husband (who does actually grow veggies and stuff) to bring in some arugala for the salad. You do know that if you make a salad to go with the delivered pizza, it becomes a healthy nutritious well-balanced meal-just sayin'.  But I digress...

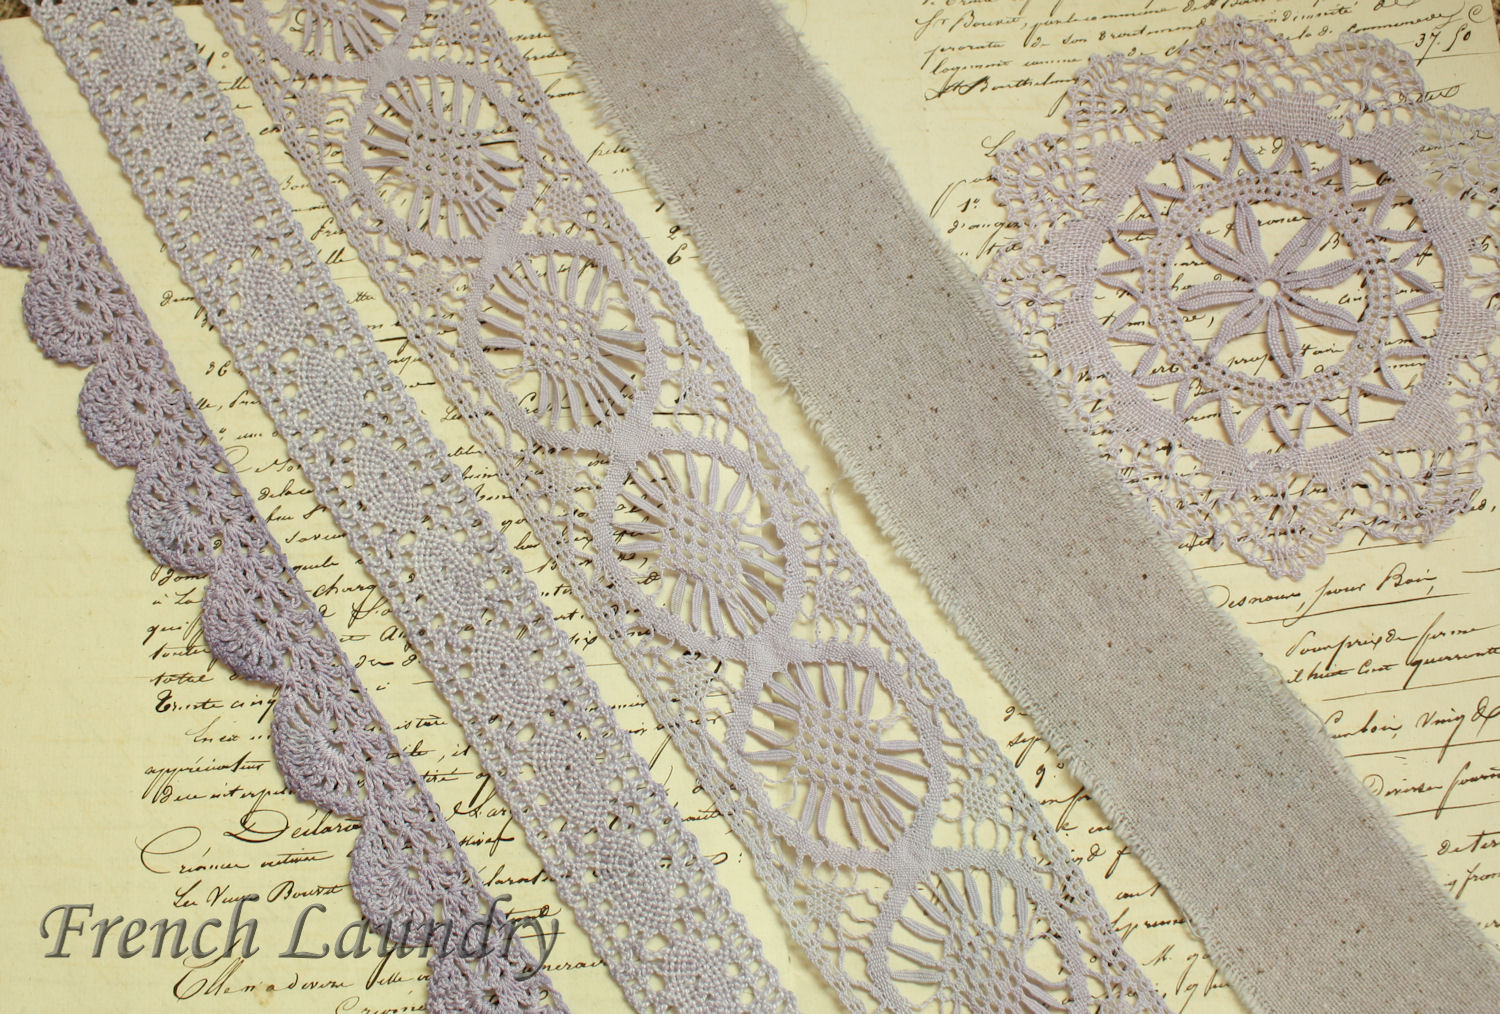
Back to the topic of natural dyes: Mr. FL, in addition to veggies grows lots of beautiful flowers, among them, rather stunning Bearded Iris.  I'd seen on Pinterest a while back a pin about using avocado skins to dye with, supposedly turning fabric and lace a light pink,  and so we'd been having a discussion about that when he says, "I wonder if you could dye with these?"  He handed me a bunch of spent Iris blooms from one of our really dark purple plants.  I decided we should find out right then and there. I gathered up a variety of cotton and linen laces, a doily, and a piece of torn natural muslin and dyed them. Instructions can be found further down the post. I was overjoyed at the results. The color is a bit more accurate on the first two photos, but as you can see, it turned out a very nice lavender purple.  The content of the fabric you are dying affects how the pieces take the dye, just like with any other dye, so you can get lots of variation from piece to piece even if you dye everything at the same time. Makes it rather interesting I think. Is it color-fast?  I don't know.  The water ran clear pretty quick after I took them out of the dye pot and rinsed them, but since I plan on using these things for art journals and things that won't be washed, I've not taken that next step in the research.  Perhaps another day for that, oui? 


There are several books out that discuss all of the myriad of plant materials (and even bugs) that have been used for centuries to dye fiber.  I don't have one, but perhaps I should add one to my library-like I need one more "thing" to get into...sigh.  Many plant materials make a very different color to dye with than they actually are.  Like the avocado skins (more on that later in the post).

Anyway, this is a crappy picture of the Iris I used.  It is called Superstition.  If you've ever grown Iris, you know that the petals are very wet so I had an inkling that the juice from them might make a good dye having had spent heads land on  my white counter and make a nice deep stain.  The flowers are much lovelier than my photo, but you get the idea.


Here's what my hand looked like when I went out to the garden and removed additional spent heads from the plant.  Kind of like blueberry stains.  You can see the spent heads underneath-not so pretty.


There's probably loads of versions of how to dye with natural materials available, but this is what I did.

I used 6 or 8 flowers heads.  I pulled out a stainless steel pot, added some water-maybe 2 cups-ish, and about a half a cup of white vinegar and boiled it.  I then added the Iris blossoms after cutting the green stem pieces off, and boiled them for about a half an hour.  I strained the blooms out and returned the liquid to the pot. Then, I put in my WET laces and fabric and simmered them in the pot for about 30 minutes. If you want less color, do less time, more color, do more time. It will dry a little lighter than the way it looks when you first pull it out of the pot, but not too much. Rinse it in cold water until the water runs clear and then hang or lay out to dry.  It will retain a slight vinegary smell which will dissipate, but if you want to take it to the next level and try washing it, that will of course, go away. Make sure you wash it by itself just in case the color "goes away" too-you wouldn't want to send your hubs off to work in a purple tie dyed dress shirt, right?   After my fabrics dried, I ironed them since a lot of things can be "heat set" by using the higher settings on the iron.  Not sure if this was necessary, but I did it anyway.  The above process obviously didn't yield a bunch of dye, but since I was just experimenting, I didn't need a lot.

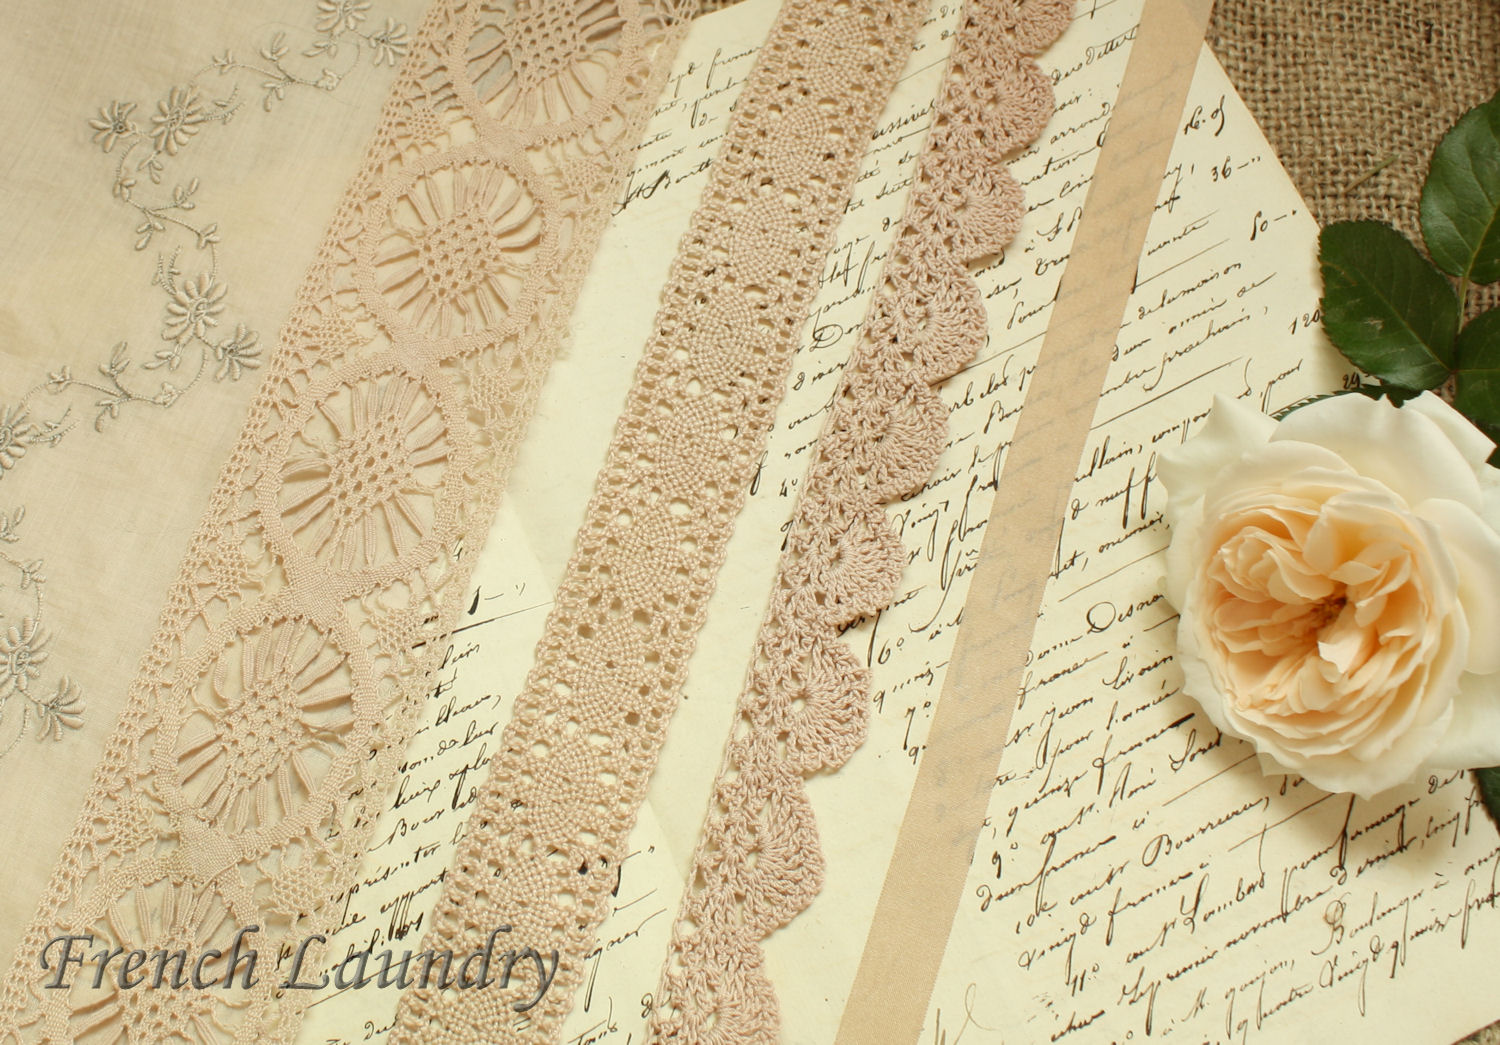
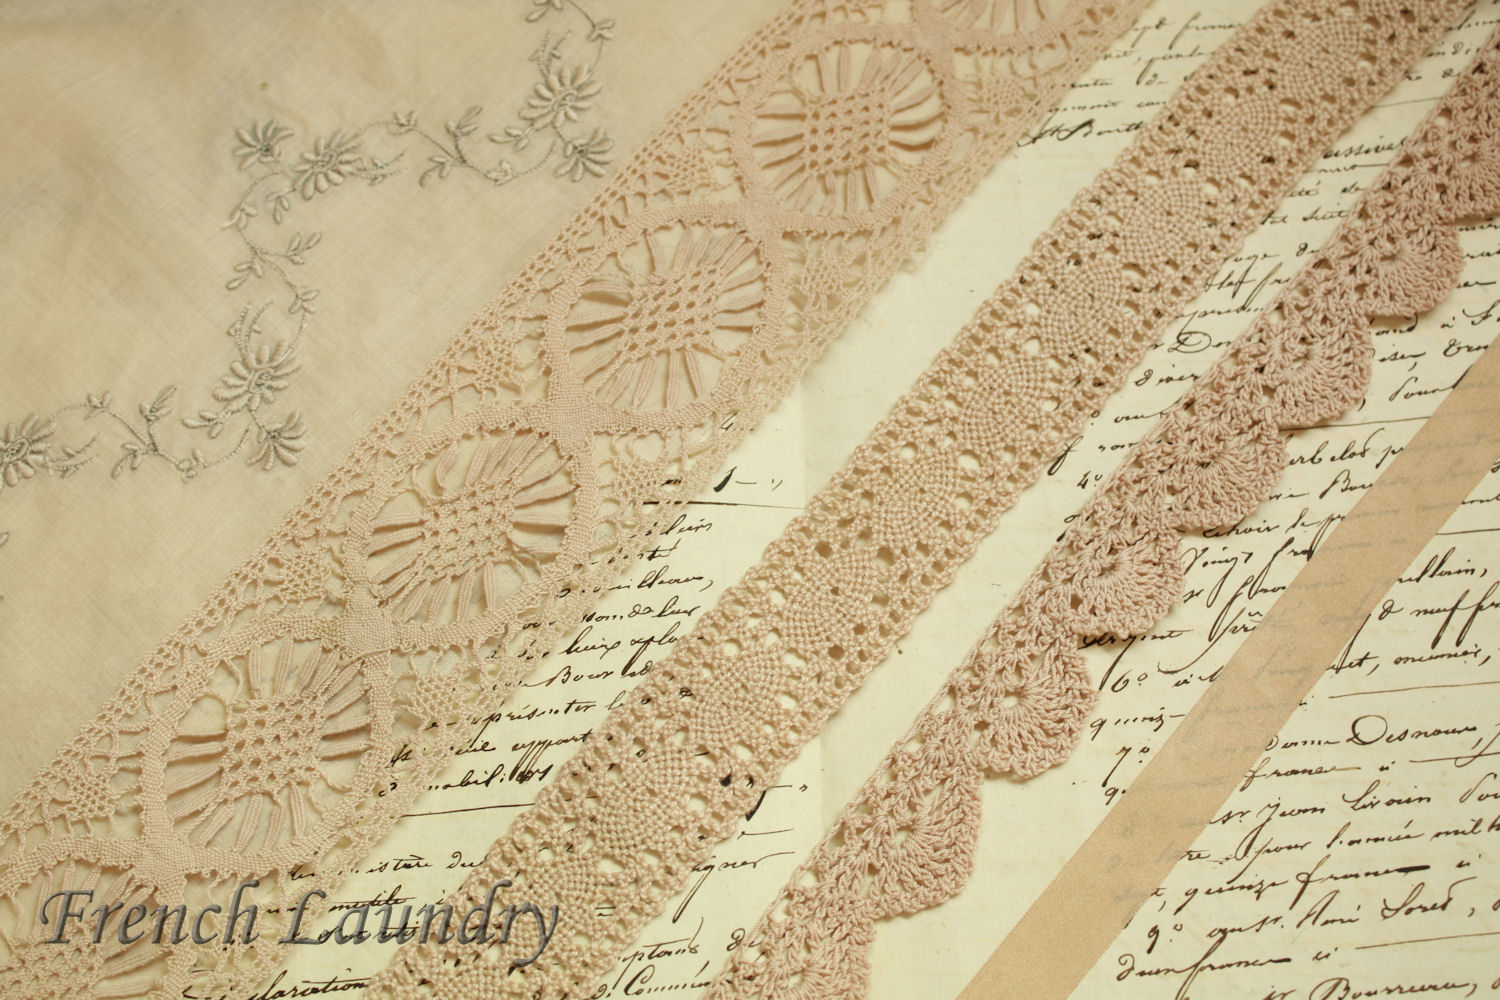
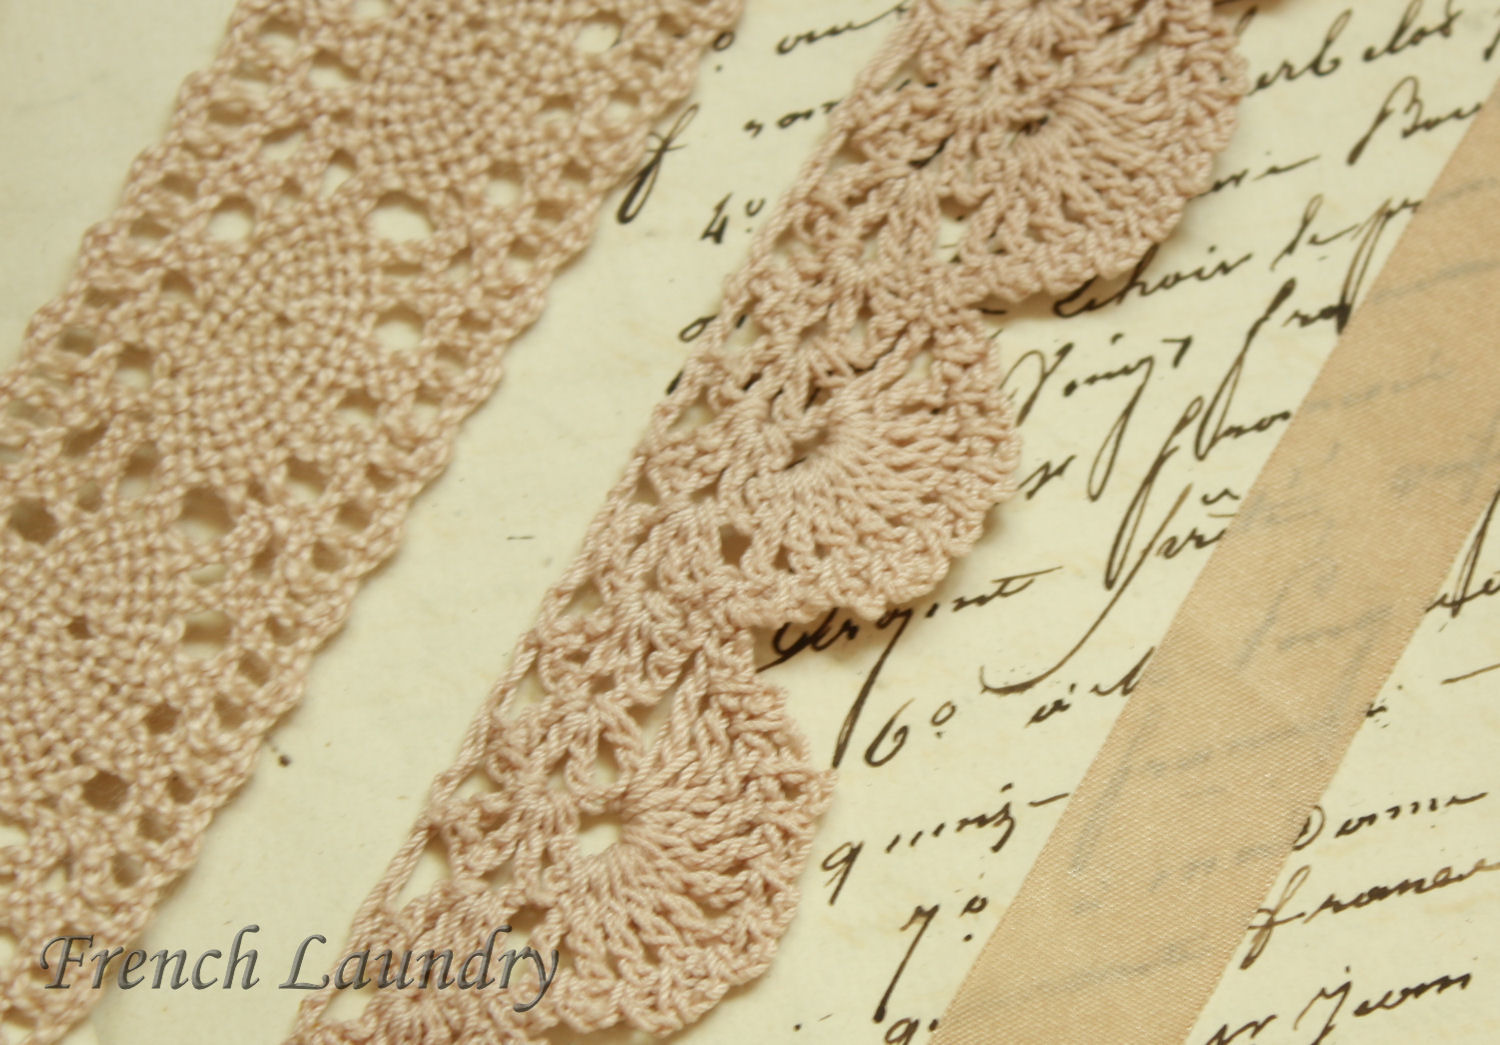
After having the success with the Iris blooms, I decided to pull out those avocado skins I'd been saving in the freezer and do the same thing with them.  In my case, I found that simmering the fabric for 30 minutes produced a very pale tan color, not too exciting.  I returned them to the simmering pot, got it boiling for just a bit, then covered the pot with a lid and turned the heat off.  I left them in the pot all day and was very pleased with the results-definitely a pinkish cast to them, not quite as pink as the pins I'd seen, but very pleasing. Who'd a thunk it? Dark green avocado skins dye stuff pinky tan.  Like I said before, some things are kind of weird and interesting like that.


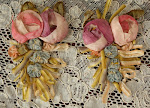
I had to go to my real job after shooting the above photos, but check back tomorrow for an update to this post to see what happened when I threw the spent petals from these vibrant roses in my little dye pot...I was quite pleased...If you should want to try this, do use a stainless steel pot so nothing leaches in to or out of the pot and if you are really going to get into the dying process, you should probably go to a thrift store and purchase a designated dye pot that you don't use for your food.

I should take an additional moment to mention my friend Debra over at Common Ground.  She featured me and my little blog today on her Vintage Inspiration Friday post and I was just gobsmacked!  What a sweetheart she is and I was just on cloud 9 all day after reading it.  Do stop over and visit her and her wonderful linky party which she faithfully hosts every week in addition to a great Monday Marketplace linky party where you can showcase your wares from your personal Etsy shops, websites, etc.  It is truly a wonderful group of participants each and every week for both of those parties.  Then, there's Debra's great style in her own home which she blogs about and I drool over...  Thank you, Debra for supporting me with your kind words and friendship over the last few years.  Love ya girl!


As promised, here is how my vat of rose petals dyed the laces and a little scrap piece of cream colored silk...


I was very happy with the results.  I really didn't have high hopes, but it turned out very nifty.


Since you were kind enough to hang in there this long, I will leave you with some of my favorite old roses from our garden.  Enjoy your long weekend!


Until next time,


Linking up with:
Time Travel Thursday
Creative Things Thursday
Vintage Inspiration Friday
Feathered Nest Friday
Shabbylicious Friday
Simple and Sweet Friday 
Pink Saturday

Pin It!