A few weeks ago, I was shopping at a little junque shop in town. I say junque because junk is a bit harsh, but antique is a bit of a stretch. I saw this little metal terrarium thing complete with candles and silk flower bits (I appreciate the thought, but not so much the outcome). I didn't buy it first time around, but then a couple of weeks, went back and decided it just needed to come home with me. AND I needed to do a little fussing with it until it was more rusty crusty and full of character. Below is what it looked like when I brought it home.
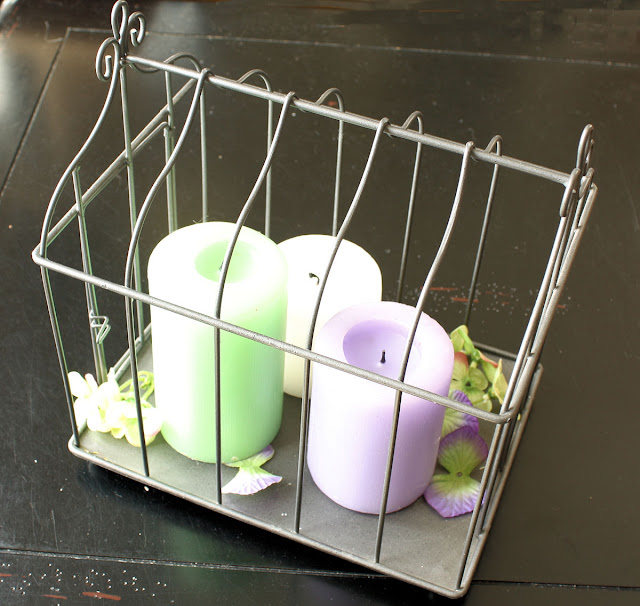 |
| Before, as purchased. Not bad, just not me |
I have used this product before and like it a bunch. It is Sophisticated Finishes and it can be found at Michael's. It comes in a bunch of different finish options and is a 2 step process.
 |
| This set gives an aged copper patina |
First you paint on the base coat. I had the aged copper kit, so the first step made everything deep copper metallic color.
 |
| After the first step of the process. Copper metallic finish. |
Then, you add the patina liquid and let it sit. I did a lot of dappling with a sponge brush and just let it run wherever. As you might guess, the tray got the best of the patina since it is flat and the liquid doesn't run off. If you like "extra crusty", you can toss a little salt in the mix and it does a bit of the pock thing. Kinda cool.
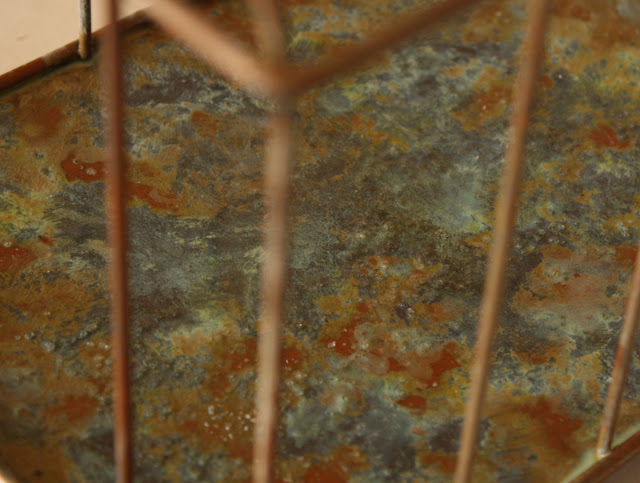 |
| After the second "patina" step has been added. |
I liked it, but it was a little too orangey for the look I wanted, so I got on line and found out that Sophisticated Finishes also has a kit that is iron and rust. Since I used up the last of my copper patina on this project and I had a coupon for 40% off at Michael's, I decided to replenish my rusty crusty maker stock with the iron and rust. I then dabbled on both steps so I wouldn't completely obliterate the coolness of the finish I already had, but I could just tone it down a bit. Below is the result.
 |
| After adding dabs of the Iron/Rust set |
I like it. Funny how sometimes it just takes a little more layering before you're happy with the result.

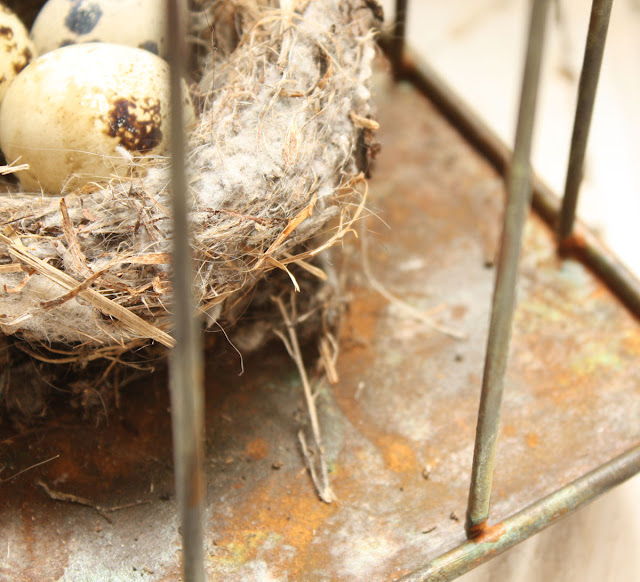
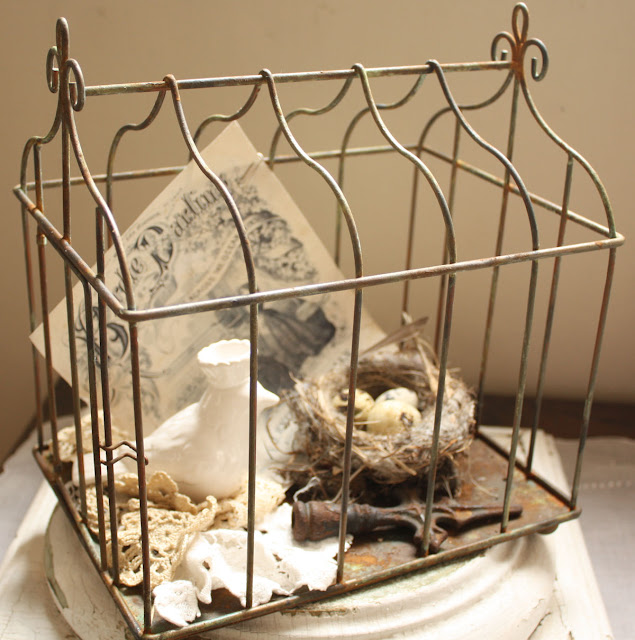
Then came the fun part of putting some stuff in the structure. I printed off some stuff from the Graphics Fairy and decided on the Birdie Darling sheet music cover. I added an actual bird's nest which was abandoned in one of my Christmas wreaths one year, put in some Quail eggs, a little lace scrap to soften things, a crusty old finial, and the cute little porcelain bird which was on clearance at Michael's (OK, yes, impulse buy, but I did resist the first time I saw it and only bought it the second time around, so I think I get a little credit!). I'm not sure I'm totally happy with the inside vignette yet, but the fun thing is, I can play until my heart is content now that I have it looking the way I wanted. I like that now it isn't so obviously new like it was before. Rusty and crusty and a little elegant. Ahhhhhh, PERFECT! And, pretty easy as well. If you like to alter stuff to look like old metal, I think the Sophisticated Finishes do a pretty good job. The kit runs around $12, but you can get several small projects out of it and, of course, if you use a coupon, it is much more reasonable.
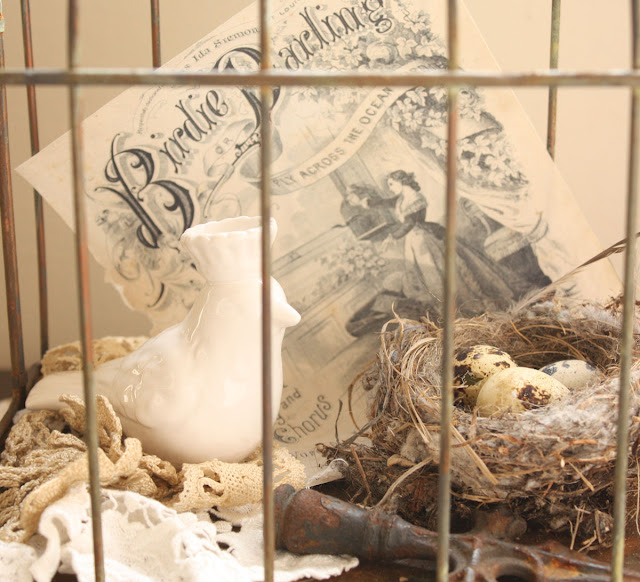 |
| Filled with fun "junk" |
 |
| It has cute little ball feet although its just balanced on my architectural piece right now. |
I'm linking up with Kathleen's White Wednesday over at
Faded Charm and Debra's
Vintage Inspiration Friday. Stop on over and get filled up on eye candy galor!
Don't forget my Romantic Prairie Style "Show Me Your Style" Photo Challenge that you can enter for a chance to win your very own copy of the fabulous Fifi's
Romantic Prairie Style. Read about it
here. Hope you gals don't mind, but I'm pushing back the deadline to enter the challenge to April 30th. We all need more time, right? Or maybe that's just me...smile.
Until next time,


OH this is beautiful!!
ReplyDeleteI love that! I'm going to have to get me some of that!!! The terrarium looks so much better rusty:)
ReplyDeleteI so love love what you created! just beautiful, every little detial. so glad you came by to see me and Krumpet.
ReplyDeleteKaren
Oh yes, you did it PROUD...do like it a great deal better than the original.
ReplyDeleteAnd your personal touches to the inside were just what it needed to finish it off. Love it.
Thanks for dropping by and saying Hi thru Faded Charm.
Rose
This is a really neat process and your container turned out perfectly beautiful!! I have a little candle lantern that Id love to try this with!
ReplyDeleteXO,
Jane
Judy, this is awesome! So love your finishing touches ... clever idea.
ReplyDeleteHave a lovely eve ~
TTFN ~
Marydon
j'adore judy! what a transformation. sooo sweet!
ReplyDeleteYou certainly had vision for this one. It looks totally charming, but as it was at first I would have walked on by. Love what you did with this piece. ~ Sarah
ReplyDeleteThat's great! i like all the different layers. Thank you for the instructions...I have a piece that needs this.
ReplyDeleteLinda
Thank you for sharing this Judy! Your terrarium looks TRULY old and rusty - what a perfect patina you ended up with. I must try this with existing pieces I have that look too 'new'.
ReplyDeleteClever girl, and I love the vignette!
Happy WW,
Susan
I love it! I have the cutest blue bird who would like lovely sitting in there! Oh my, I wish I could find such a simply lovely treasure.
ReplyDeleteLove the transformation! Just beautiful.
ReplyDelete~Heidi
I really like what you put inside as well as the finish. Everything is soooo much better! I can't imagine having the patience to paint all those little wire bars. Twice. No, three... four times? LOL I'd have given up after the first coat or never have started because I'd know I'd give up after the first coat.
ReplyDeleteJudy, so cute I have to say it's amazing how we can transform something that is plain into something amazing... Just beautiful.... hope your having a great week
ReplyDeletePattie
that is a huge difference for the better!!
ReplyDeleteIt looks so cute the way you have it displayed.
Happy WW
Amy
I'll bet your glad you went back for the piece. It looks antique now. I love the finish.
ReplyDeleteDanielle
I love it Judy!;) Now im going to have to buy some of that stuff~ Hugs, Rachel
ReplyDeleteFrench Farmhouse 425
wow, it hardly looks like the same piece. You saw the great potential, it looks gorgeous!
ReplyDeleteWhat a difference, I love your antique look- you have done a great makeover!
ReplyDeleteAll around fabulous!
ReplyDeleteLove how you did it all.
ReplyDeleteAnd the nest. tell us about the nest!
blessings
barbara jean
love everything in your blog!!!!!!!!!!!!!!!!!!!!!!!!!!!!!!!!!!!!!!!!!!!!!!!!!!!!!!!!!!!!
ReplyDeletegorgeous!!!!!!!!!!!!
love the photos!
take care,
Rosa
This turned out so sweet. I love the treatment and the rusty look outcome....looks fabulous!
ReplyDeleteLove the birdie theme too.
hugs
Sissie
liebe Judy, das Herz hängt an alten schönen Dingen...
ReplyDeletees ist wunderschön bearbeitet, eine nette Dekoration, man kann immer etwas verändern,
die Freude ist groß....
liebe Grüße Jasmin
Amazing! I am so impressed! I can hardly wait to try out that product on my next yard sale find! I love your vignette and isn't the Graphic's Fairy a wonderful resource for us crafty folks? You should really link this project up for the Graphic's Fairy's Brag Monday! She usually starts the party on Monday morning. Thank you for your kind visit to my blog!
ReplyDeleteBest Wishes and Blessings,
Amanda
Love, Love, Love the End results ~ Thanks for sharing with us!
ReplyDeleteCheryl
Well now how cool is that??? pretty darn cool
ReplyDeleteThis is very cool! I love how it turned out and what fun to turn this into something so crusty rusty pretty...way better than the original! The next time I'm out I'm stopping at Michaels to buy some of that paint. Thanks for the suggestion on my urns...and you are right, I can always start light and add more.
ReplyDeleteThat is wonderful! I haven't see that product before. The patina is fantastic!
ReplyDeleteSherry
Oh Judy. This turned out so BEAUTIFUL!!! I just love that it now has that old world charm...and the contents are just as lovely ~ hugs and love, Dawn
ReplyDeleteIt looks so sweet and I love the sheet music touch inside!
ReplyDeleteGor-ge-ous! Love the birdie sheet music...it is the perfect touch...I came over tonight to enter and found out about the extension...me, need more time? oh, ya....now i'll just keep on working.
ReplyDeleteTTYL
Rene
I love how the cage turned out, simply beautiful. I just got the same bird at Michaels the other day, can't wait to decorate with him. You have a lovely blog, discovered it through Common grund. I am your follower now.
ReplyDeleteHave a fantastic weekend!
PS. I used to live in Colorado, beautiful State, I come back to Aspen twice a year for vacation.
XXX Ido
Hi Judy,
ReplyDeleteI do love the antique look you have given your sweet new purchase. You have decorated it beautifully with the bird and nest theme.
Happy weekend
Hugs
Carolyn
I am awestruck at this gorgeus transformation! I love the look you have achieved! I can't thank you enough for sharing! I had a bit of a discussion with the hardware guy and he wasn't helpful, and thought I was mad when I said I wanted to rust something up! I am going to get online to see if I can buy some of that iron product! THANKS! You have made my day! Happy Easter! X
ReplyDeleteLove the patinas!!! I've used SF but also like Modern Masters Metal Effects ( Porter Paint carries it). I would probably patina the dog if he would stand still. Am working on a 3 tiered chandelier - for an outdoor wedding next weekend ,Arrrggghhh!!
ReplyDeleteI love what you did to this! It made it such a different piece form the original, so much better!
ReplyDeleteLove your blog, I live in CO, too!
~Shanon